Introduction
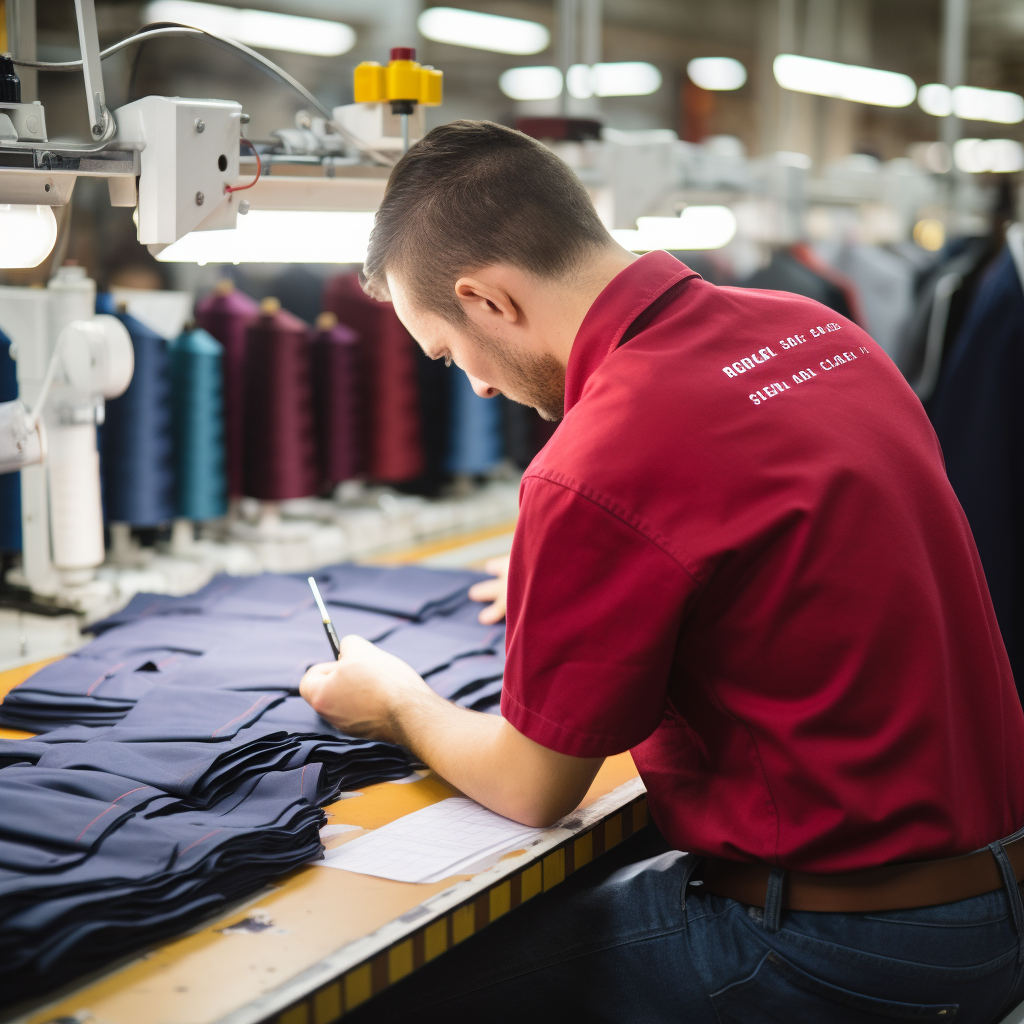
Importance of Quality Control in Clothing Manufacturing
In the highly competitive landscape of clothing manufacturing, quality control isn’t just an afterthought—it’s a necessity. Poor quality can not only tarnish your brand’s reputation but can also lead to costly recalls, returns, and lost sales. This article aims to serve as a comprehensive guide to ensure that the clothing samples you receive from your manufacturer meet the highest quality standards.
Scope and Objective of the Article
In this article, we will delve into the methodologies, tools, and best practices for conducting a quality control check of clothing samples from your manufacturer. You’ll find the content particularly useful whether you’re an entrepreneur launching your first fashion brand or an established business looking to fortify your quality checks.
Who Should Read This Article?
- Clothing brand owners
- Fashion entrepreneurs
- Quality control managers
- Procurement specialists
- Anyone interested in the clothing manufacturing process
By the end of this article, you’ll have an in-depth understanding of how to perform a thorough quality control check, what to look for in your clothing samples, and how to navigate potential pitfalls.
If you find this chapter useful, please continue reading for more detailed, expert insights into each aspect of the quality control process.

Understanding Quality Control
Definition and Importance
Quality control (QC) refers to the process of ensuring that a product meets specified criteria for excellence, consistency, and reliability. In the context of clothing manufacturing, QC becomes crucial in validating that each garment matches the design specs, complies with safety standards, and meets customer expectations. Given the high costs associated with product returns and damaged brand reputation, QC should be a top priority for any business in the fashion industry.
Types of Quality Control Checks
- Pre-production QC Checks: These occur before mass production begins and often involve checking the raw materials and the initial samples.
- In-line QC Checks: These are performed during the manufacturing process, usually after a specific stage of production to catch defects early.
- Final QC Checks: These are comprehensive checks conducted on the completed items before they are shipped.
- Random Sampling: Sometimes, it is impractical to check every item, so a random sampling method is used.
Relationship Between Quality and Cost
Higher quality often correlates with higher costs, but the two are not always directly proportional. Investing in quality from the outset can lead to long-term cost savings by reducing returns and bolstering brand reputation. However, it’s crucial to find a balance between quality and cost to maintain profitability.
Understanding the nuances of quality control is the first step to ensuring that your products meet the standard they deserve. This sets the stage for the rest of the quality control process, from preparation to post-check actions.
Preparing for the Quality Control Check
Assembling a Team
Before diving into the QC process, you’ll need a dedicated team to carry out the checks efficiently and effectively. This team should ideally consist of:
- QC Manager: Oversees the entire process, from planning to reporting.
- Inspectors: Responsible for the hands-on evaluation of each sample.
- Documentation Specialist: Takes care of compiling the findings in an organized manner.
Training your team on the standards and procedures is vital for maintaining consistency in quality checks.
Gathering Tools and Equipment
The right tools can make or break your QC process. Depending on what you’re looking to evaluate, the toolkit may include:
- Tape Measure: To check dimensions and fit.
- Color Swatches: To ensure color accuracy.
- Fabric Tester: To gauge fabric quality and durability.
- Seam Ripper: To assess stitching strength.
- Magnifying Glass: To closely examine fine details.
Developing a Checklist
A detailed checklist serves as the foundation for a thorough QC process. This should be tailored to your specific needs but should generally include:
- Fabric Type and Quality: Ensuring the material used aligns with your standards.
- Construction and Stitching: Evaluating seams, embroidery, and other details.
- Size and Fit: Confirming that the sample matches the sizing chart.
- Colors and Prints: Validating the hues and patterns against your design specs.
- Hardware: Checking zippers, buttons, and other add-ons for both function and quality.
Having a well-prepared team, the appropriate tools, and a comprehensive checklist will streamline your QC process, minimizing errors and ensuring that you don’t overlook any critical aspects.
Quality Control Parameters for Clothing
Fabric Quality
One of the most crucial aspects of any garment is the fabric from which it’s made. During your QC check, pay attention to:
- Texture: Whether the fabric feels smooth, rough, or gritty to the touch.
- Weight: Lighter or heavier than specified can indicate poor quality.
- Stretch: Does it maintain its shape after stretching?
- Transparency: Ensure it matches the intended design specifications.
Stitching and Seams
The way a garment is sewn together can be a good indicator of its overall quality. Look for:
- Evenness: The stitches should be evenly spaced.
- Thread Quality: Strong, durable thread should be used.
- Loose Ends: There shouldn’t be any hanging threads.
- Alignment: Check if the seams align at corners and intersections.
Colors and Prints
When assessing colors and prints, you must consider:
- Color Fastness: Rub the fabric to ensure the color doesn’t bleed.
- Sharpness: Prints should be sharp and clear, not fuzzy or blurred.
- Consistency: The colors should be consistent across different parts of the garment.
- Matching: The color should match the predetermined swatches or specifications.
Size and Fit
Proper size and fit are vital for customer satisfaction. Always:
- Measure: Use a tape measure to confirm dimensions.
- Fit Test: On a mannequin or model, if possible.
- Check Labels: Ensure size, care, and material labels are correct and securely attached.
Zippers, Buttons, and Trims
Don’t overlook these smaller components:
- Functionality: Zippers should slide smoothly; buttons should be secure.
- Alignment: Ensure they are straight and aligned correctly.
- Material: Confirm that it meets your specification, be it metal, plastic, or some other material.
- Aesthetics: Ensure they complement the garment’s overall look.
By being meticulous in assessing these parameters, you’ll increase the likelihood of catching any potential defects or inconsistencies before they become larger issues.

Conducting the Quality Control Check
Step-by-step Process
Conducting a QC check isn’t a haphazard activity but rather a structured process that requires diligence. Here’s how to go about it:
- Sample Receipt: Unpack the sample carefully, maintaining all packaging for reference.
- Initial Overview: Perform a quick first impression check for glaring errors.
- Checklist Review: Refer to your pre-established checklist and start ticking off points as you go.
- Detailed Inspection: Use your tools to make precise measurements, conduct stretch tests, and assess colors and stitching.
- Documentation: Keep a record of findings, preferably with photos, for each parameter.
- Internal Review: Have the QC team review the findings to make sure nothing has been overlooked.
- Score the Sample: Use a point system to score the sample on each parameter.
Addressing Common Problems
During your QC check, you may encounter common issues like:
- Stitching Errors: If you find uneven stitching, document it and consider whether it’s a deal-breaker.
- Color Discrepancies: A slight deviation might be acceptable, but a major one should be flagged.
- Incorrect Sizing: Double-check with your specifications and note any variations.
- Faulty Zippers or Buttons: Determine if they can be easily replaced or if the whole sample is compromised.
Documentation
Proper documentation is not just about accountability; it’s a learning tool for future checks. Ensure your documentation includes:
- Photographic Evidence: For each flaw or approved element.
- Detailed Notes: For every item in your checklist.
- Action Points: What needs to be corrected or confirmed with the manufacturer.
- Scoring Sheet: To objectively compare different samples.
By meticulously following each of these steps, you lay the foundation for a transparent and effective quality control process. This chapter serves as your guide for actually carrying out a QC check, but remember, your job isn’t done when the check is complete.
Post-Check Actions
Reviewing the Results
After the quality control check, compile all the findings into a comprehensive report. This should include:
- Graded Parameters: Each aspect you checked should be graded or scored.
- Problem Areas: Highlight issues that need immediate attention.
- Comparative Analysis: If multiple samples were checked, compare them to identify consistencies or discrepancies.
Communicating with the Manufacturer
The next step is arguably one of the most crucial—opening a line of communication with your manufacturer to discuss the findings.
- Initial Contact: Use your established channels, whether it’s email, phone, or a formal meeting.
- Present Findings: Share your report, including photos and scores, to make your case.
- Negotiate Corrections: Some issues may require renegotiation of terms or costs.
- Set Deadlines: Time is often of the essence, so establish a timeline for corrections to be made.
Revisions and Rechecks
In some cases, the manufacturer will revise the sample and send it back for another round of QC checks. In such instances:
- Re-examination: Conduct a new QC check, focusing especially on the areas that previously had issues.
- Validation: Ensure that the changes align with the agreed-upon corrections.
- Final Approval: Once the sample meets all criteria, give the go-ahead for mass production.
By taking these post-check actions seriously, you not only ensure the quality of the current sample but also set a precedent for future manufacturing runs, contributing to a long-term, beneficial relationship with your manufacturer.
Tips and Best Practices
Leveraging Technology
Embracing modern technology can make your quality control process more efficient and accurate. Here are some tech solutions to consider:
- QC Software: Invest in specialized QC software that allows for real-time tracking and reporting.
- Color Matching Systems: Ensure perfect color replication across all pieces.
- 3D Scanning: For precise size and fit measurements.
Common Pitfalls to Avoid
- Rushing the Process: Quality control is a meticulous task that should not be rushed. Allocate sufficient time for each check.
- Ignoring Small Errors: Even minor errors can snowball into major issues later. Address them upfront.
- Lack of Communication: Keep an open channel with your manufacturer to tackle problems as they arise.
- Skipping Rechecks: Never assume that a corrected error stays corrected. Always recheck.
Other Tips
- Audit the Manufacturer: Whenever possible, visit the manufacturing site to gain a first-hand view of the production process.
- Continuous Learning: Keep updated on new quality standards, tools, and industry benchmarks.
- Adapt and Revise: The QC process is dynamic. Update your checklists and protocols based on past experiences.
By implementing these best practices, you significantly enhance the efficacy of your quality control procedures, ensuring a higher likelihood of success in your clothing manufacturing endeavors.
Conclusion
Quality control is not just a phase in the production process; it’s a cornerstone of your brand’s reputation and success. This article has equipped you with the tools and knowledge needed to conduct an effective QC check on your clothing manufacturer samples. Remember, the end goal is to produce a garment that not only meets but exceeds your customers’ expectations.
Frequently Asked Questions (FAQs)
What is Quality Control in Clothing Manufacturing?
Quality Control (QC) in clothing manufacturing involves a set of processes designed to ensure that the garments produced meet specific quality standards.
Why is Quality Control important?
Quality Control is essential for maintaining brand reputation, reducing returns, and ensuring customer satisfaction.
What tools are commonly used in Quality Control?
Tape measures, fabric testers, and color swatches are among the common tools used in Quality Control.
How do I communicate issues to my manufacturer?
Communication channels can include email, phone, or formal meetings. Always back up your findings with evidence like photos or documents.
What if the revised sample still has issues?
If the revised sample still doesn’t meet your standards, another round of QC checks should be done, followed by further negotiations with the manufacturer.