Quilting and patchwork are art forms that date back centuries, capturing the hearts of creators for their blend of functionality and creativity. The process of quilting involves the joining of two or more layers of fabric, usually with a soft, thick interlining, while patchwork refers to the craft of sewing together pieces of fabric to form a pattern or block which often becomes part of a quilt.
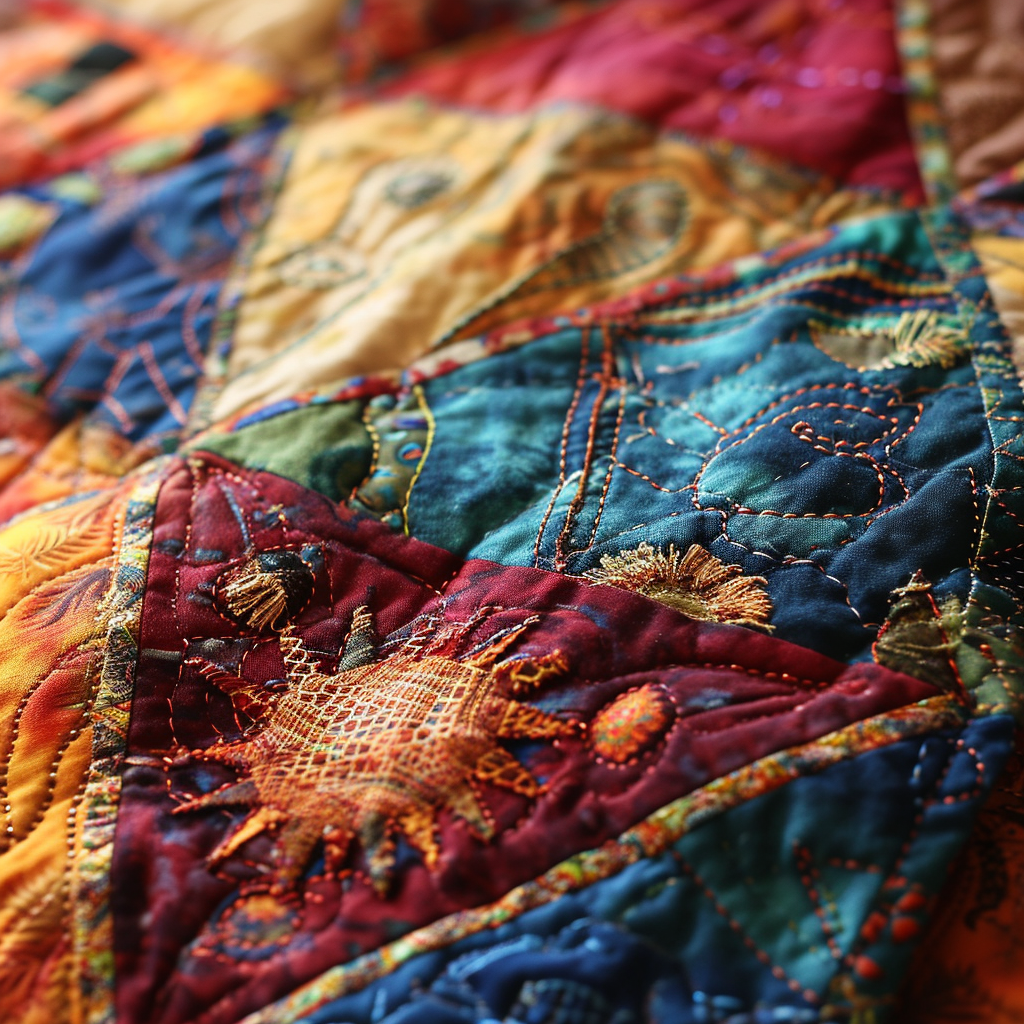
Crafting a quilt is akin to painting with fabric, threading memories and stories into every piece. This art form requires patience, precision, and a passion for design. It is a beloved hobby that has evolved into a professional skill for many, with quilts becoming treasured heirlooms or significant pieces of art displayed with pride.
For a clothing factory, introducing quilting and patchwork into its range can expand its repertoire, allowing it to offer bespoke and high-quality products that stand out in a competitive market. This step-by-step guide is designed to empower you with the knowledge to create intricate quilts and patchwork, whether for personal projects, gifts, or commercial endeavors.
Embarking on this journey, we’ll explore the essential tools, materials, and techniques required to craft beautiful, durable quilts. From selecting the right fabrics to the final stitch, we’ll delve into each step with precision—ensuring that every reader, from novice to expert, can follow along and achieve stunning results.
Understanding the Basics of Quilting and Patchwork
Quilting and patchwork are rooted in practicality and resourcefulness. Historically, they served to make the most of fabric scraps, transforming them into warm, durable blankets. Today, these crafts blend utility with artistic expression, allowing for endless creativity in designing and constructing textile masterpieces.
The Art of Quilting
Quilting is the process of stitching together multiple layers of fabric, typically a top layer of pieced or whole cloth, a batting layer for warmth, and a backing layer. The stitching can be functional, holding the layers together, or decorative, adding intricate patterns.
The Charm of Patchwork
Patchwork is the craft of sewing small pieces of fabric together to create a larger design, which is often used as the top layer of a quilt. Patchwork patterns can range from simple and geometric to complex and pictorial.
Combining the Crafts
When quilting and patchwork are combined, the result is a quilted item with a patchwork top. This fusion brings the texture of quilting and the color and pattern dynamics of patchwork into a single piece.
Essential Tools and Materials for Quilting
Creating a quilt requires a suite of tools and materials that help ensure accuracy and ease throughout the process. As we delve into this essential toolkit, remember that investing in quality supplies can significantly enhance your quilting experience and outcomes.
Tools for Precision and Ease
- Rotary Cutter and Mat: A rotary cutter allows for precise cuts through multiple layers of fabric, while a self-healing cutting mat protects your surfaces and helps to extend the blade’s life.
- Quilting Rulers: These come in various shapes and sizes, offering precision and uniformity when measuring and cutting fabric pieces.
- Sewing Machine: A good quality sewing machine with a walking foot is ideal for piecing patchwork and quilting layers together.
- Iron and Ironing Board: Pressing fabric is crucial in quilting, as it keeps pieces flat and helps in aligning seams accurately.
- Needles and Pins: Quilting needles, both for hand sewing and machine, are specifically designed to handle the thickness of quilt layers. Pins keep fabric pieces securely in place before sewing.
- Thread: High-quality cotton thread is recommended for both piecing and quilting, as it is strong and can handle the tension without breaking.
- Scissors and Snips: A sharp pair of fabric scissors is essential for cutting fabric, while thread snips or small scissors are handy for trimming threads.
- Seam Ripper: An indispensable tool for correcting mistakes, a seam ripper allows you to remove unwanted stitches without damaging the fabric.
- Marking Tools: These can be pens, pencils, or chalk, used for tracing patterns and lines onto the fabric for cutting and quilting.
Materials to Bring Your Quilt to Life
- Fabric: Quilting cotton is the most popular choice due to its durability, ease of handling, and wide range of colors and patterns.
- Batting: This is the middle layer of the quilt that provides warmth. It comes in various materials, such as cotton, polyester, wool, or a blend, each offering different levels of warmth and weight.
- Backing Fabric: The back layer of the quilt can be a single fabric or pieced together from multiple fabrics. It should complement the front patchwork design.
- Binding: The fabric strips that encase the raw edges of the quilt for a clean finish. It’s often cut on the bias (diagonally across the grain) for flexibility and durability.
By gathering these tools and materials, you set the foundation for a successful quilting project. With the right equipment in hand, the process becomes smoother, allowing you to focus on the creative aspects of your quilt-making journey.
Designing Your Quilt Pattern
The design phase is where your quilt begins to take shape in your imagination before it comes to life through fabric. It’s a creative process that allows you to envisage the final product and plan the steps to achieve it.
Starting with Inspiration
- Theme and Color Scheme: Decide on a theme or color palette that appeals to you or suits the purpose of the quilt. Colors can set a mood, while themes can make a quilt tell a story.
- Sketching Ideas: Drawing your quilt on paper or using quilting software can help visualize the pattern and determine how it will look when pieced together.
- Pattern Complexity: Consider your skill level and the time you have available. Beginners might start with simple blocks, while more experienced quilters might opt for intricate patterns.
Choosing the Right Pattern
- Block Patterns: These are the building blocks of patchwork and can range from simple squares to complex stars and other shapes. There are countless traditional and modern block patterns available.
- Size and Scale: Determine the overall size of the quilt and the size of each block. This will affect the number of blocks you need and the amount of fabric required.
- Repetition and Layout: Decide how you want to arrange the blocks. Will you repeat the same block, alternate two different blocks, or mix several patterns?
Finalizing Your Design
- Calculating Fabric Needs: Based on your pattern, calculate how much of each fabric you’ll need, including extra for seaming allowances and any mistakes.
- Creating Templates: For more complex shapes, create templates out of cardboard or template plastic. This ensures consistency in size and shape for each piece.
- Consider the Quilting: Think about how you will quilt the layers together. The quilting can complement the patchwork design, so consider the quilting lines as part of the overall design.
Designing your quilt is a step that merges creativity with planning. It’s a delicate balance between the artistic vision and the practical aspects of construction. Take your time with this stage; a well-thought-out design is the blueprint for a successful quilt.
Cutting and Piecing Your Patchwork
The transition from design to tangible product begins with cutting and piecing your patchwork. Precision in this stage is paramount, as it sets the tone for the rest of your project.
Preparing Your Fabric
- Washing and Ironing: Pre-wash your fabrics to prevent shrinkage and color bleeding after the quilt is made. Iron all your fabrics to remove wrinkles, ensuring accurate cutting.
- Aligning the Grain: Understand the grain of your fabric. Cutting pieces on the grain reduces distortion and helps your quilt lay flat when finished.
Cutting Your Pieces
- Measuring Twice, Cutting Once: Use your quilting rulers and rotary cutter to measure and cut pieces. Accuracy is critical, so double-check your measurements before cutting.
- Consistency is Key: Ensure all pieces are cut to the exact specifications of your pattern. Any variations can lead to mismatched seams and a quilt that doesn’t lay flat.
Piecing the Blocks
- Sewing Seams: Use a consistent seam allowance, usually 1/4 inch, for all pieces. A special presser foot on your sewing machine can help maintain this consistency.
- Pressing Seams: Press your seams as you go. The direction to press (to the side or open) depends on the pattern and your preference, but be consistent.
- Assembling the Blocks: Lay out the pieces for each block according to your design. Sew them together in sections, then join the sections to complete the block.
Joining the Blocks
- Arranging the Layout: Place your completed blocks on a flat surface or design wall to view your layout. Rearrange as necessary before joining.
- Sewing the Blocks Together: Start sewing blocks into rows, then sew the rows together. Pay attention to the alignment of seams and corners.
- Checking for Accuracy: After assembling a few rows, check the overall appearance. Make adjustments if necessary before proceeding further.
Cutting and piecing are like putting together a puzzle. The joy of seeing your design emerge as the pieces join is rewarding, yet requires patience and attention to detail. Take your time, enjoy the process, and remember that this stage is the foundation of your quilt’s final appearance.
Assembling the Quilt Sandwich
Once your patchwork top is pieced together, the next step is to create the quilt sandwich. This is where you layer the quilt top, batting, and backing to prepare for quilting.
Preparing the Layers
- Quilt Top: Ensure your pieced top is pressed and all threads are trimmed. Any bulk in the seams should be flattened as much as possible.
- Batting: Choose the right batting for your quilt. Cut the batting slightly larger than your quilt top to allow for any shifting during the quilting process.
- Backing: The backing should also be larger than the quilt top. If you need to piece the backing, remove selvedges and use a 1/2 inch seam allowance.
Layering the Quilt
- Laying Flat: On a large, flat surface, lay the backing fabric wrong side up. Tape or clamp the edges to the surface to keep it taut.
- Adding Batting: Lay the batting on top of the backing. Smooth out any wrinkles or creases.
- Placing the Quilt Top: Carefully place the quilt top over the batting, right side up. Smooth it out so there are no wrinkles or puckers.
Basting the Layers
- Basting Options: You can baste your quilt using safety pins, basting spray, or hand basting with large stitches. The goal is to keep the layers stable and prevent shifting during quilting.
- Starting from the Center: Begin basting from the center and work your way outwards. This helps to avoid wrinkles and ensures the layers stay flat.
- Spacing Basting Pins: If using pins, place them every few inches apart. The closer the pins, the more stable the sandwich will be while quilting.
Preparing for Quilting
- Checking the Sandwich: After basting, check the entire quilt to make sure everything is smooth and flat. Make any necessary adjustments.
- Planning Your Quilting: Decide on your quilting design. This could be straight-line quilting, free-motion designs, or following the piecing seams.
- Setting Up Your Machine: If you’re machine quilting, install the appropriate presser foot and set your machine for quilting. For larger quilts, a quilting frame or a machine with a long arm can make the process easier.
Assembling the quilt sandwich is a critical step that affects the quilt’s final look and feel. Take your time to ensure the layers are smooth and well-basted before you begin quilting. This preparation is key to a well-finished product.
The Quilting Process
Quilting is the process of stitching together the three layers of the quilt sandwich—the top, the batting, and the backing. This step not only secures the layers together but also adds texture and design to the finished quilt.
Choosing Your Quilting Design
- Design Options: You can choose from a variety of quilting designs, such as straight-line quilting with a walking foot, free-motion quilting, or even hand quilting for a traditional touch.
- Planning the Pattern: Depending on your quilt’s design, you may want to highlight certain areas, follow the piecing, or create a contrast with the quilt top pattern.
Machine Quilting
- Straight-Line Quilting: Use a walking foot to help feed the layers evenly. Mark lines with chalk or use masking tape as guides to ensure straight stitching.
- Free-Motion Quilting: Lower the feed dogs on your machine, attach a free-motion foot, and move the quilt freely under the needle to create stippling, loops, or other decorative patterns.
- Pace Yourself: Machine quilting can be time-consuming. Take breaks to avoid fatigue and ensure quality stitches.
Hand Quilting
- Using a Hoop or Frame: A hoop or frame can help keep the quilt taut while hand quilting. This makes it easier to produce even stitches.
- Thimble and Needles: Use a thimble to protect your fingers and choose the right needle size for your comfort and the thickness of your layers.
- The Running Stitch: The most common hand-quilting stitch is the running stitch, creating a series of even stitches on the quilt’s surface.
Finishing the Quilting
- Securing the Ends: Whether machine or hand quilting, secure your thread ends by tying or burying them between the layers.
- Trimming the Excess: Once the quilting is done, trim the excess batting and backing to prepare for binding the edges.
- Inspecting Your Work: Look over your quilt for any missed areas or loose threads. Make any necessary repairs before moving on to binding.
Quilting not only holds the quilt together but is also an opportunity to add another layer of creativity to your project. Whether you choose to quilt by machine or by hand, the key is to select a method that complements your quilt top and is enjoyable for you.
Binding Your Quilt
Binding is the final step in completing your quilt. It involves covering the raw edges of the quilt sandwich with a strip of fabric to give it a finished look and to ensure durability.
Preparing the Binding Strips
- Calculating Fabric: Determine the total length of binding needed by adding up the perimeter of your quilt and allowing extra for mitering corners and joining ends.
- Cutting Strips: Cut strips of fabric on the bias or cross-grain, depending on the finish you want. Bias binding is more durable and flexible, especially for curved edges.
- Joining the Strips: Sew the strips together end-to-end using diagonal seams to reduce bulk. Press the seams open.
- Folding the Binding: Fold the strip in half lengthwise, wrong sides together, and press.
Attaching the Binding to the Quilt
- Starting the Binding: Leave a tail of several inches and start sewing the binding to the quilt from the top with a 1/4 inch seam allowance, aligning the raw edges.
- Mitering the Corners: As you approach a corner, stop 1/4 inch from the edge, fold the binding in a 45-degree angle, and then fold it back down to align with the next side. Continue sewing.
- Joining the Ends: When you come full circle, join the ends of the binding strips with a diagonal seam, trim the excess, and finish sewing it to the quilt.
Finishing the Binding
- Folding to the Back: Fold the binding over to the back of the quilt, covering the raw edges and stitching line. Make sure the fold is just beyond the stitching line on the back.
- Hand Stitching: Use a blind stitch to hand sew the binding to the back of the quilt. This creates a nearly invisible seam on both the front and back.
- Machine Finishing: If you prefer, you can machine stitch the binding to the back. This is faster but will be visible on both sides.
The Final Touches
- Corners: Ensure that the corners are neatly mitered and stitched down for a professional finish.
- Inspecting the Binding: Check the entire binding for any skipped areas or loose threads. Make any necessary touch-ups.
- Washing and Caring: If desired, wash your quilt according to the care instructions for your fabrics. This can also give your quilt a soft, crinkled look that many quilters love.
Binding your quilt is a satisfying conclusion to your quilting project. It frames your work and gives it a polished look, ready to be used and cherished for years to come.